Not long ago my work buddy, David Ayling, approached me about an idea he and his former co-workers had. He pitched me a simple show about an ad agency run by hipster cats called CATOW. Coincidentally, CATOW's biggest rival in the market is a company called DOGMA which run entirely by coked up dogs. Needless to say this short synopsis had me intrigued and I was eager to help on the creation. It was left up to me to come up with how we were going to actually build these episodes, all I had to go off of were some plastic cat toys that Dave had photoshopped. As I began thinking about it I knew the backgrounds would have to be fairly realistic to match that cats I was already provided. My brain led me to Aqua Teen Hunger Force. I have been a big fan of this show and had always been intrigued about how they built the background plates for the episodes. Their style lies somewhere between Adobe Illustrator texturing and photo realism. I thought this would be a perfect style to replicate for CATOW.
A brief Google search brought me
Jay's Illustration of Life and this little tutorial. I took the principals from Jay's site and started to create my own backgrounds.
I started with some simple sketches of Tom's Office and Stone's Office.
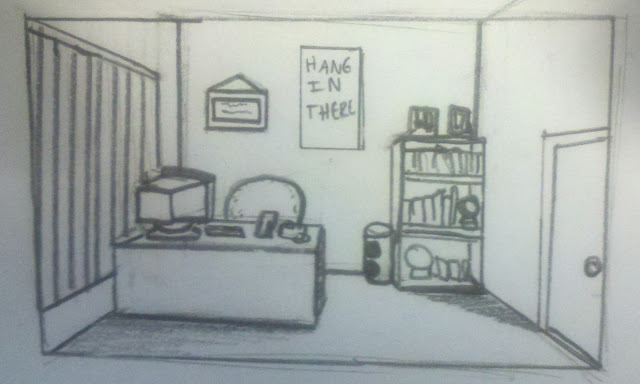 |
| Tom Caterson's Office |
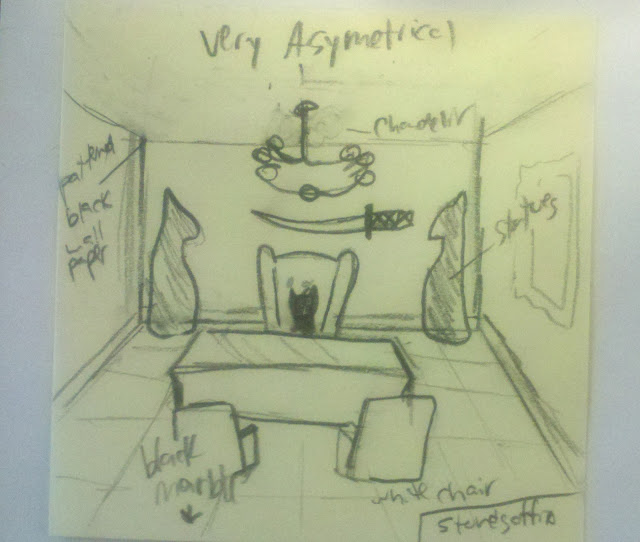 |
| Stone Catow's Office |
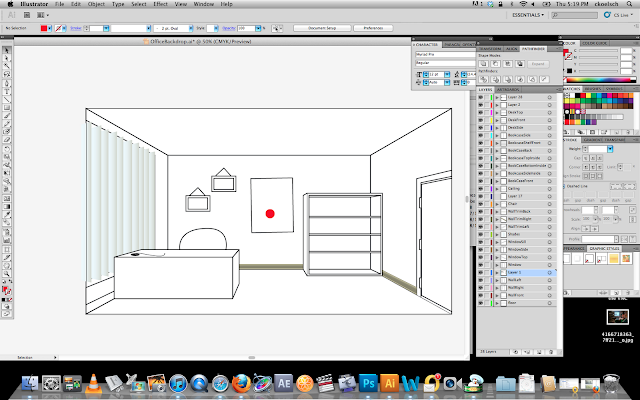
From this point I went into Adobe Illustrator and built out the rooms. At this stage it is important to think about layering and breaking objects into several shapes to make texturing easier. For instance, Tom's desk is broke into 3 separate parts (Top, Front, and Side). This makes it a lot easier for me to texture each side individually in Photoshop. The giant red dot is my point for the One Point Perspective I used to create the rooms. As you can see there are a lot less elements for Stone's office because it required less things to be textured, it was more made up of objects than anything else.
 |
| Tom Caterson's Office |
 |
| Stone Catow's Office |
Now I brought all my AI layers into Photoshop as smart objects. This makes texturing and shading extremely easy. All it requires me to do is put my AI layer in place, put my texture on another layer above it, hold alt (on Mac) and click on the line between the two layers (your hand cursor will change to two circles overlapping). Doing this makes your texture masked by your AI shape (look at my layers in the image below to see). What's really great about this is that you are free to edit, transform, and warp the texture as much as you please without worrying about losing your original shape of the AI layer. In many cases I would put another masked layer over the texture and using a large brush at low opacity I would paint in shadows to give the room a more realistic depth. I found most of my textures at
CG Textures. Texturing is the most fun for me because that site is literally a playground for stuff like this. They don't only have textures but they have buildings, doors, windows, rust, signs, posters, etc.
Below are the final results
Once my sets were complete I brought them into After Effects and imported them as
Composition - Retain Layer Sizes. This keeps all my layers in the same order that I had them in Photoshop. I worked some animation magic and below is the result. Enjoy and keep your eye out for more episodes
here.


No comments:
Post a Comment