I have been wanting to create a 3rd episode of Mean Mug & Slim and really change it up. I thought the first two episodes were fine but they were a little cheesy and safe, I want to push the boundaries a bit and have some more fun. I also wanted to try and see if I can use video or photographs as a background instead of creating illustrated backgrounds. I figured this could look cool and also save me time in the production of an episode. So to complete this I knew I needed two things.
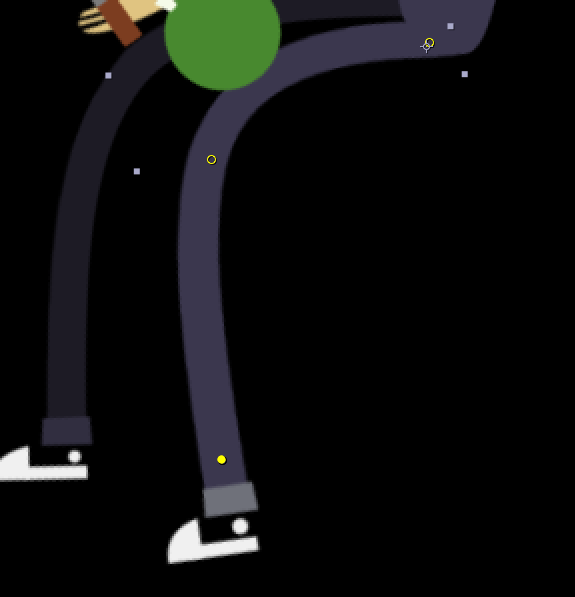
1. The illustrator file of Slim, broken out into individual layers and labeled appropriately (this is necessary for what I do in After Effects)
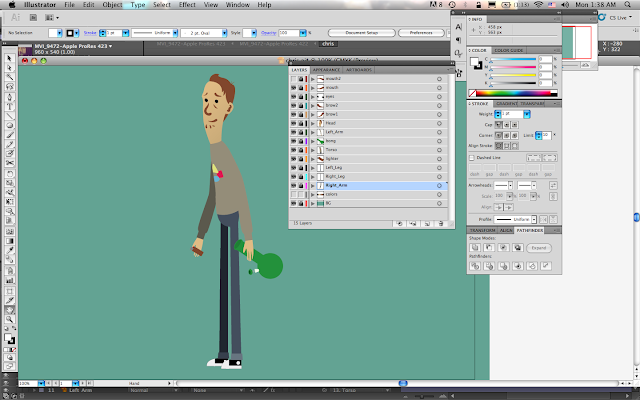 |
| Click to Englarge |
2. A video for the background (but below is just a still image because you get the idea)
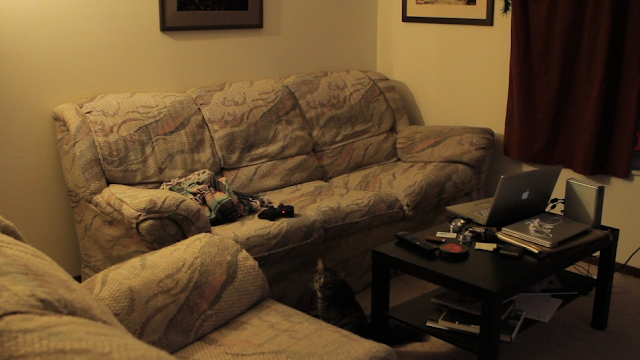 |
| Click to Enlarge |
|
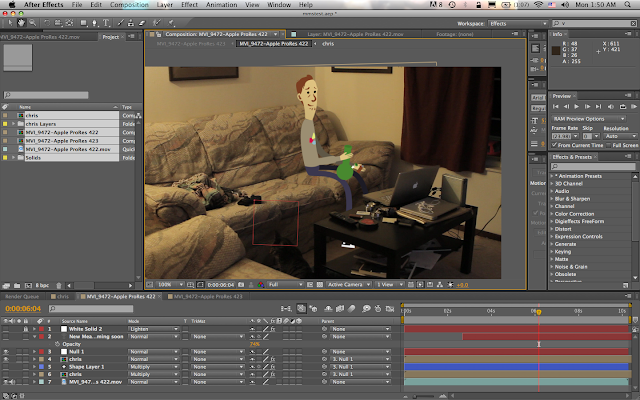
The next step is to bring Slim into After Effects. When importing you want to select the option
Composition - Retain Layer Sizes because this will keep all our layers exactly as we had them in Illustrator so our character is easy to animate.
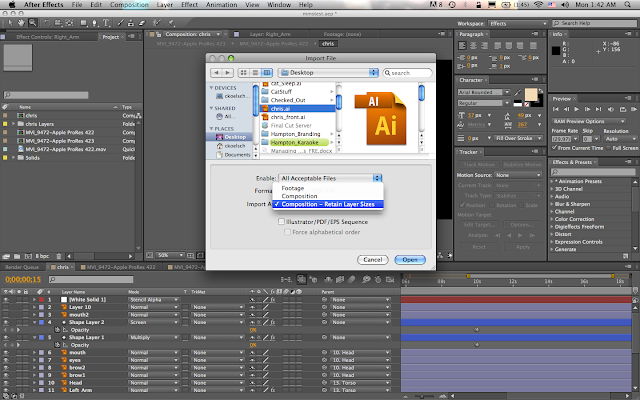 |
| Click to Enlarge |
Next, parent the appropriate body parts (arms to torso), and use puppet pins to create bends in the limbs.
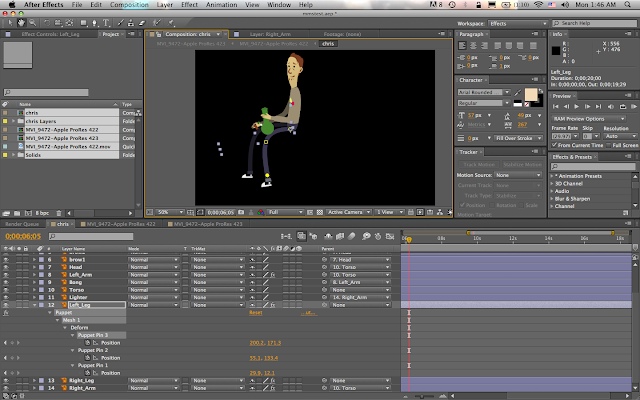 |
| Click to Enlarge |
 |
| Click to Enlarge |
Now Slim is ready to animate. I kept the animation simple because this was only a test to see if the look would work. So I placed Slim into a separate sequence with my video and masked out a section to hide him behind the table. The initial result looked pretty good!
 |
| Click to Enlarge |
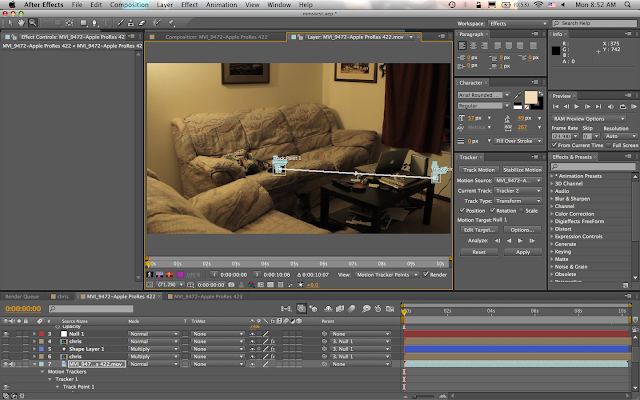
However there is a problem. My camera footage is shaky because it is hand held, and Slim doesn't stay in the same spot on the couch. Well to solve for this I simply motion tracked the position and rotation of my video and applied all keyframes to a Null layer named
Null 1. I then parented my Slim sequence to the Null 1 and everything was good to go again. In the end the motion gives the piece a realistic quality that I enjoy.
 |
| Click to Enlarge |
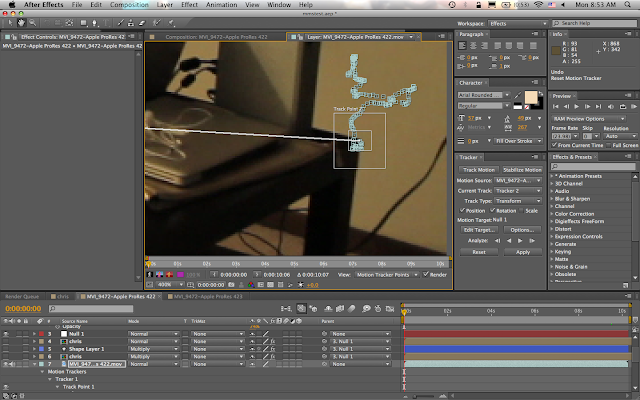 |
| Motion tracking rotation based on the corner of my table. Keeping the position and rotation points far apart is key. |
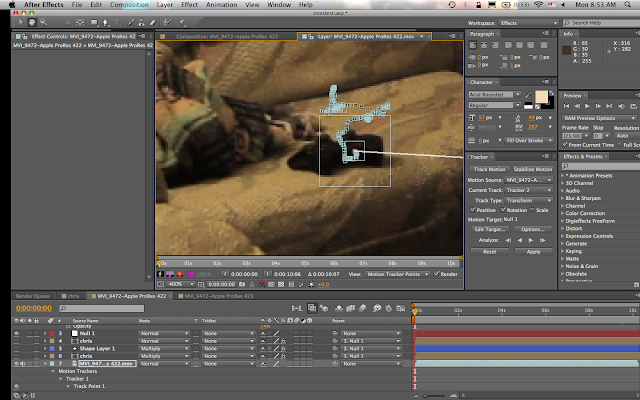 |
| Motion tracking position based on the red light of my video game controller. A high contrast area is key. |
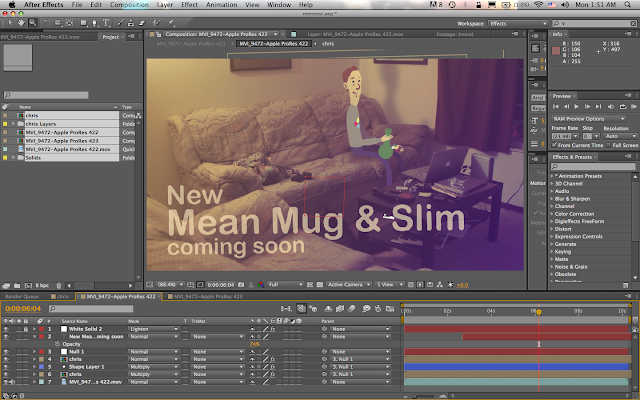
After this it's just about adding those little touches to really pull everything together. A simple title, shadows on the wall and under Slim for weight, and a color ramp with a
lighten mode over everything to pump up the lighting.
 |
| Click to Enlarge |
The final product came out as good as I could have hoped so I plan to go ahead with this process in the future. We will see if I run into any interesting problems as I do.


No comments:
Post a Comment